
What 3D printer should I get?
Most of our models are printable on a 220x220x250mm build plate volume. However, some of our smaller planes are printable on 250x210x210 or 180x180x180 build volumes. We recommend getting as large a printer as possible to speed up the printing process (multiple parts at once) and supporting all our current/future models.
A great example of an affordable, but high quality printer is the Neptune 3 Pro. The Bambu P1S is a better choice if it’s within your budget. We use this printer for most of our models.
How do I print the models?
Our files are standard STL files. All our models require mirroring of the wings and/or tail during printing. This is easily done with slicing software such as Cura or Orcaslicer. Consult your printer’s manual. We highly recommend using OrcaSlicer as it has the best performance in our experience. The fuselage and other components simply require placing on the build plate in the proper orientation. Most of our planes print entirely support-less!
Below are some guidelines on print settings:
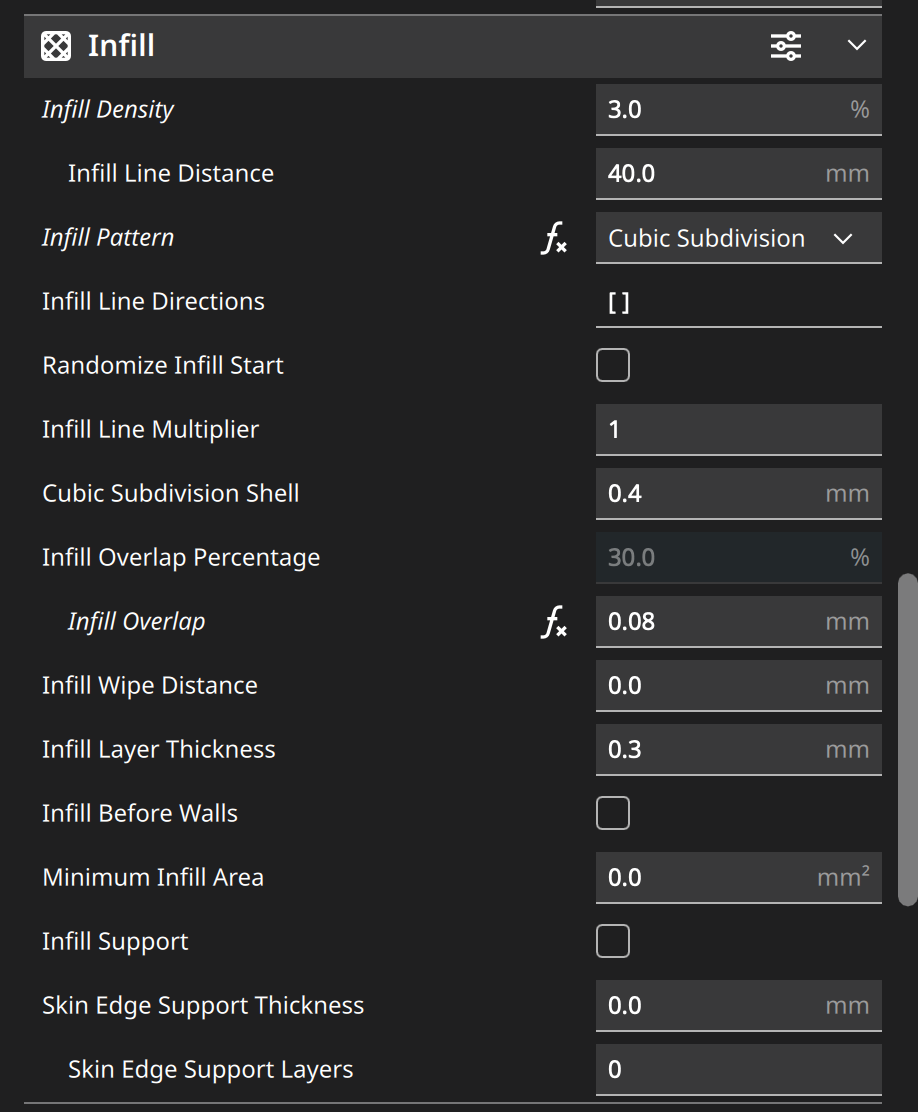
For the fuselage, wings, and tail, print using 1 wall, 3-5% (we recommend 4%) cubic subdivision (or adaptive cubic) infill. It’s crucial to print these parts with 1 wall and not multiple, since this is the majority of the airframe. Proper printer tuning will be required in order to get clean single wall parts. Some parts (such as nacelles or boom attachment pieces) may be labeled as 2 wall, so those can be printed with 2 walls.
For the motor mount, wing bay plates, or other high temp materials, print them in a high temp material such as PETG or ASA and use 2-3 walls and 10-20% infill. Use best judgement for strength while keeping the weight low.
The models we offer come with only the left wing and left stabilizers. Simply mirror the parts on the bed to make the right side.
Here’s an example of a wing section being mirrored for printing the left and right version
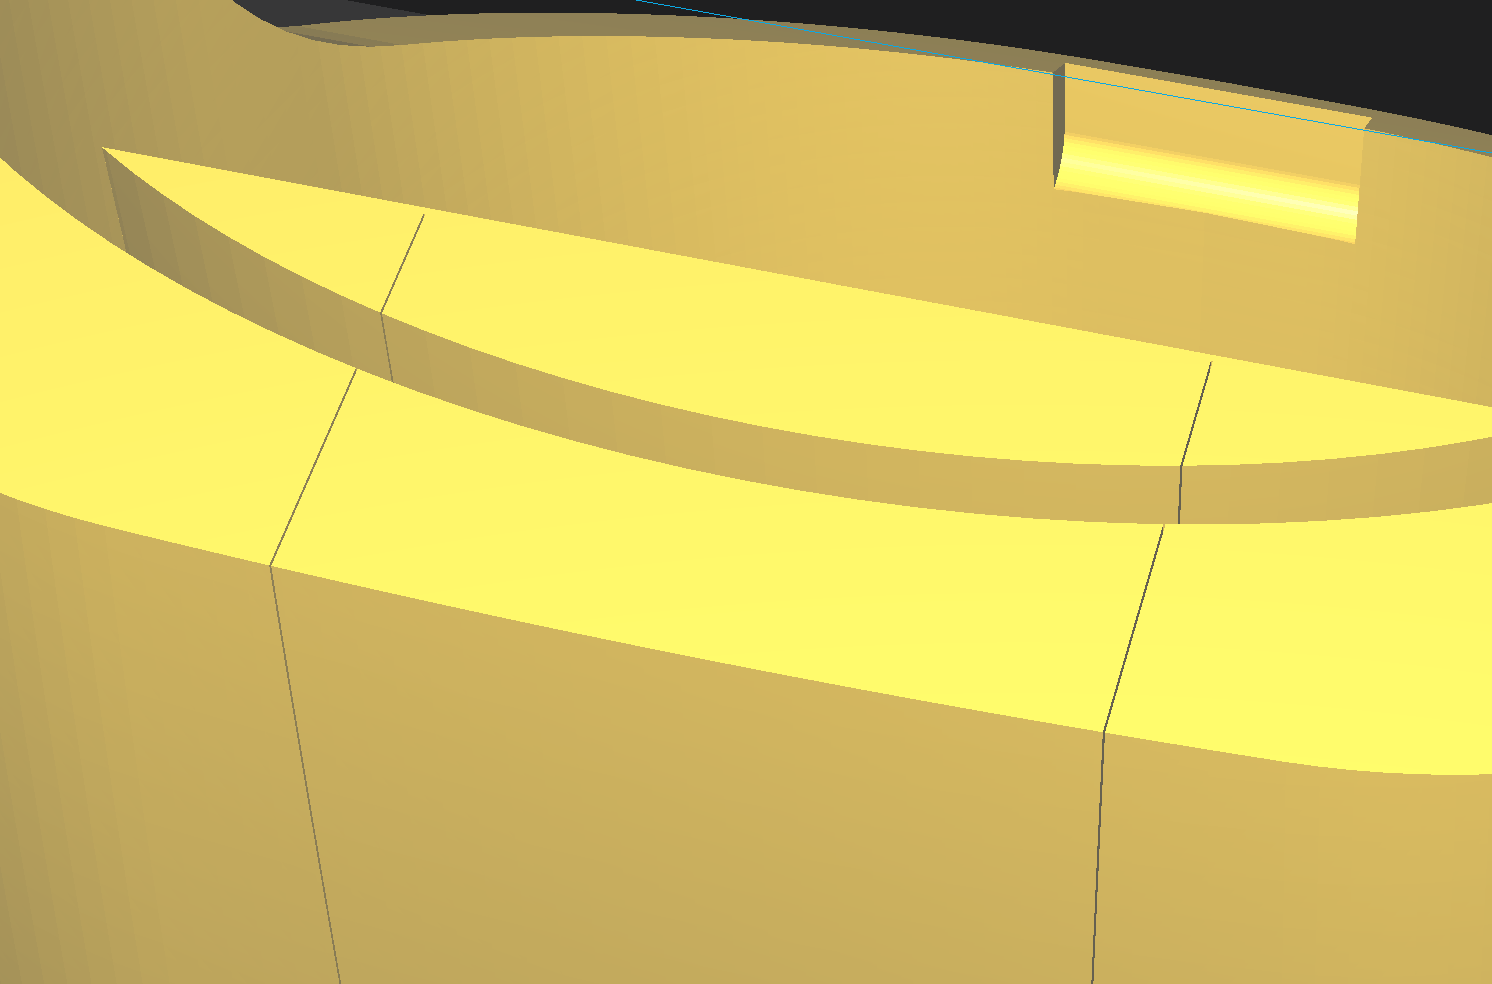
Here’s an example of a fuselage section that must be oriented properly to avoid needing supports
What materials do I need?
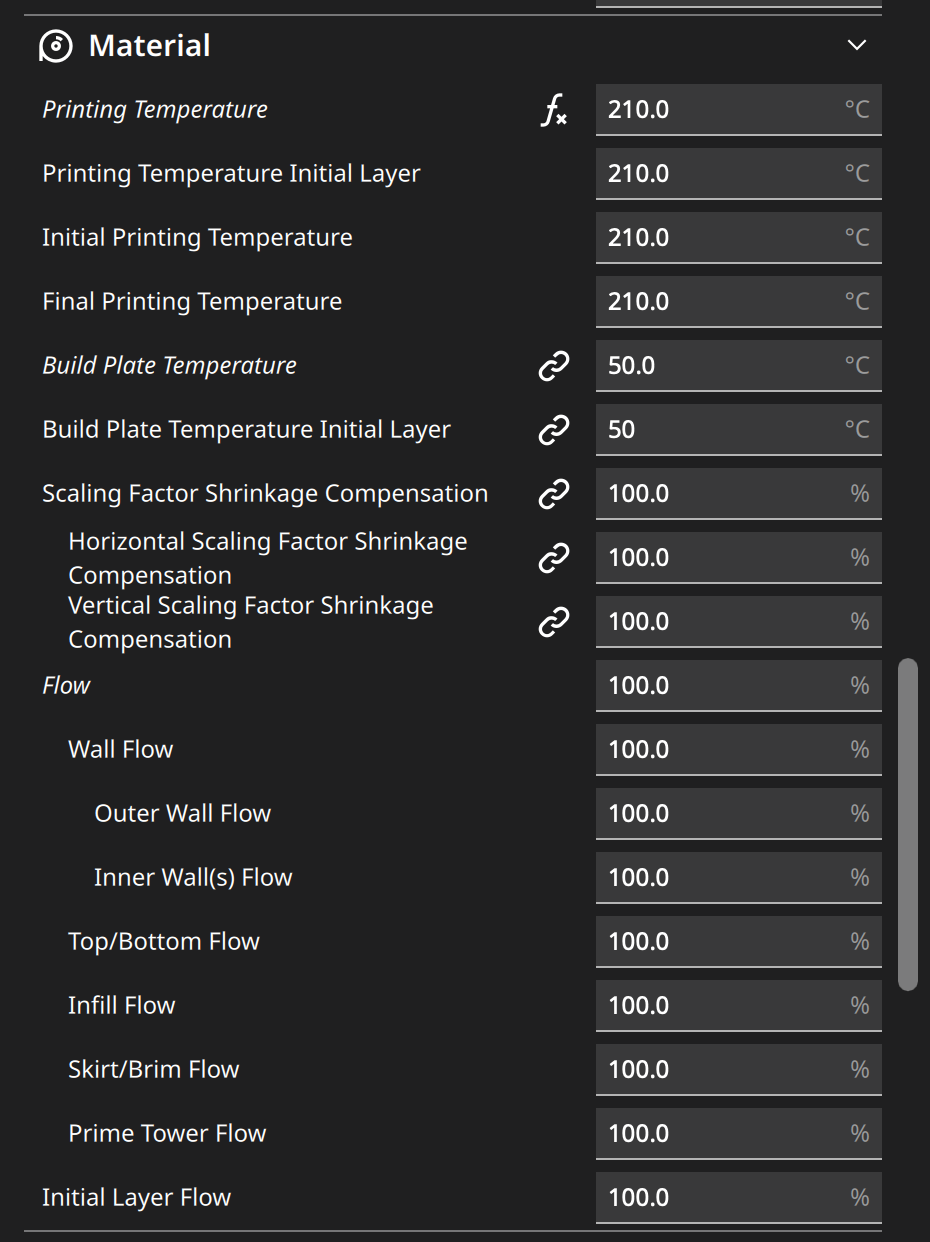
For the filament, we recommend using Polymaker Polylite LW-PLA which is prefoamed and advantageous in many ways in terms of weight and strength. It’s an almost miraculous filament which makes all of this possible! A lighter, stronger, and more temp-resistant material is the ColorFabb LWPLA but this requires more printer tuning and is slightly more expensive.
Many of our customers have had success with other materials such as ASA or ABS. Feel free to experiment - we encourage it. But keep in mind, all our stats and claims are based on LWPLA filament. Be mindful of weight, strength and rigidity when printing with those filaments, especially regular PLA or heavier materials.
Below is a list of common materials you will need:
Emax ES08MAII servos
Wires (from 12-24 AWG)
Superglue (any medium CA)
Linkages (such as these)
ESCs and Motors (consult the plane’s manual for the recommended specs)
Li-Ion or Li-Po batteries (consult the manual)
M3 threaded inserts (such as these)
M3 bolts of various lengths
At least one high-temp filament (such as PETG or ASA) for motor mounts and other parts that may get warm
Spars of various diameters and lengths (consult the manual). They can be purchased here and other many places
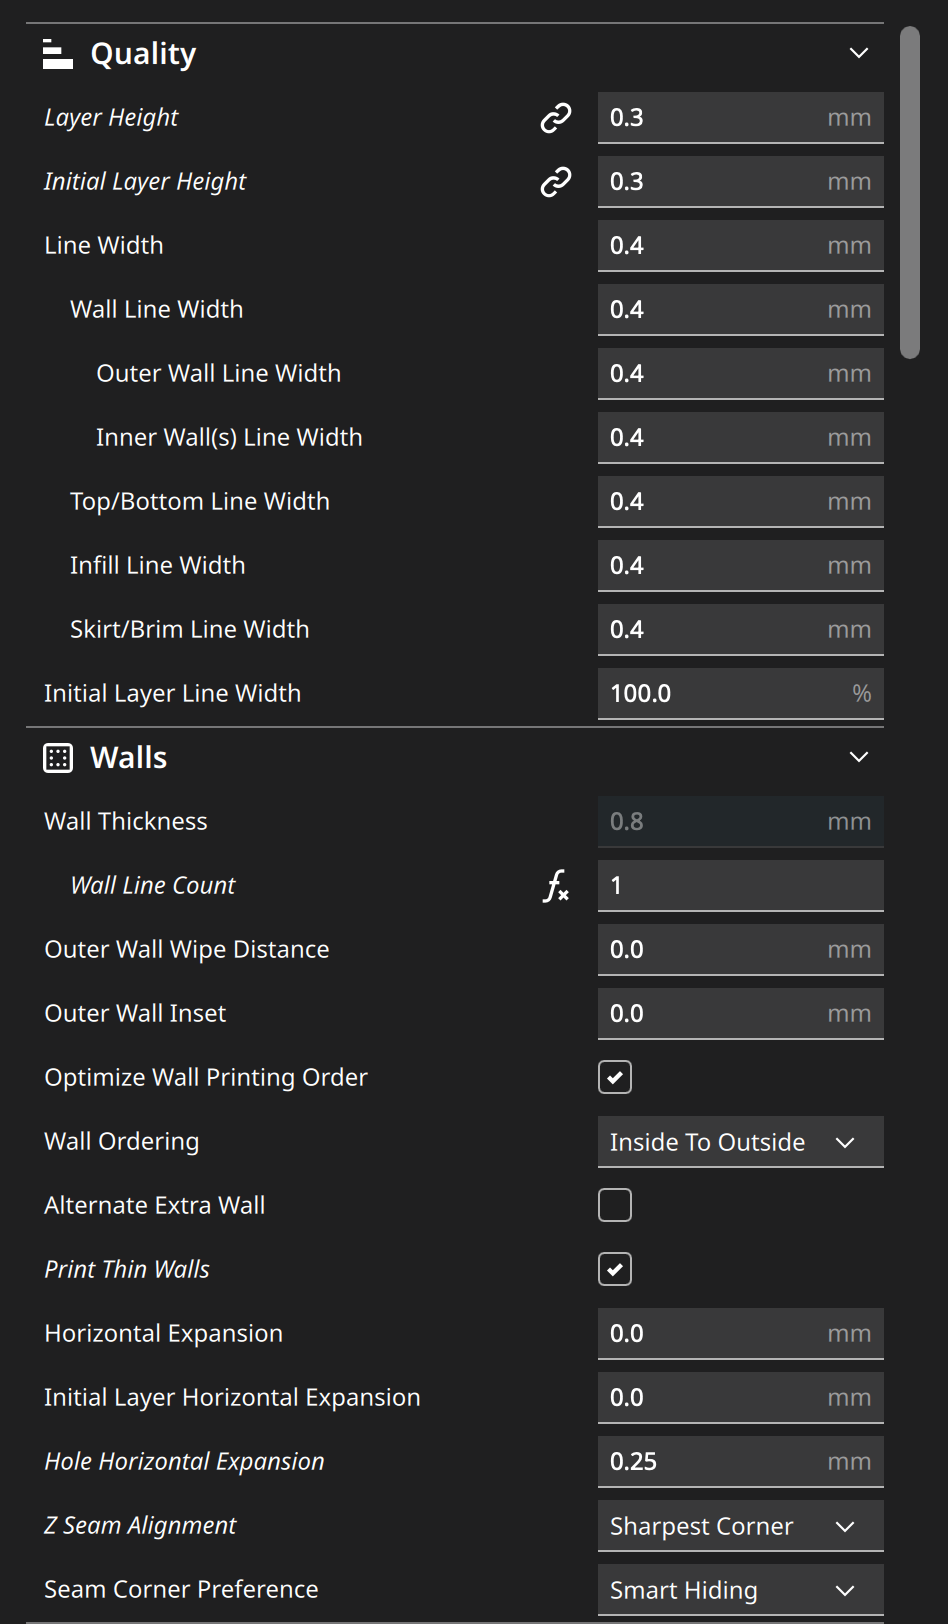
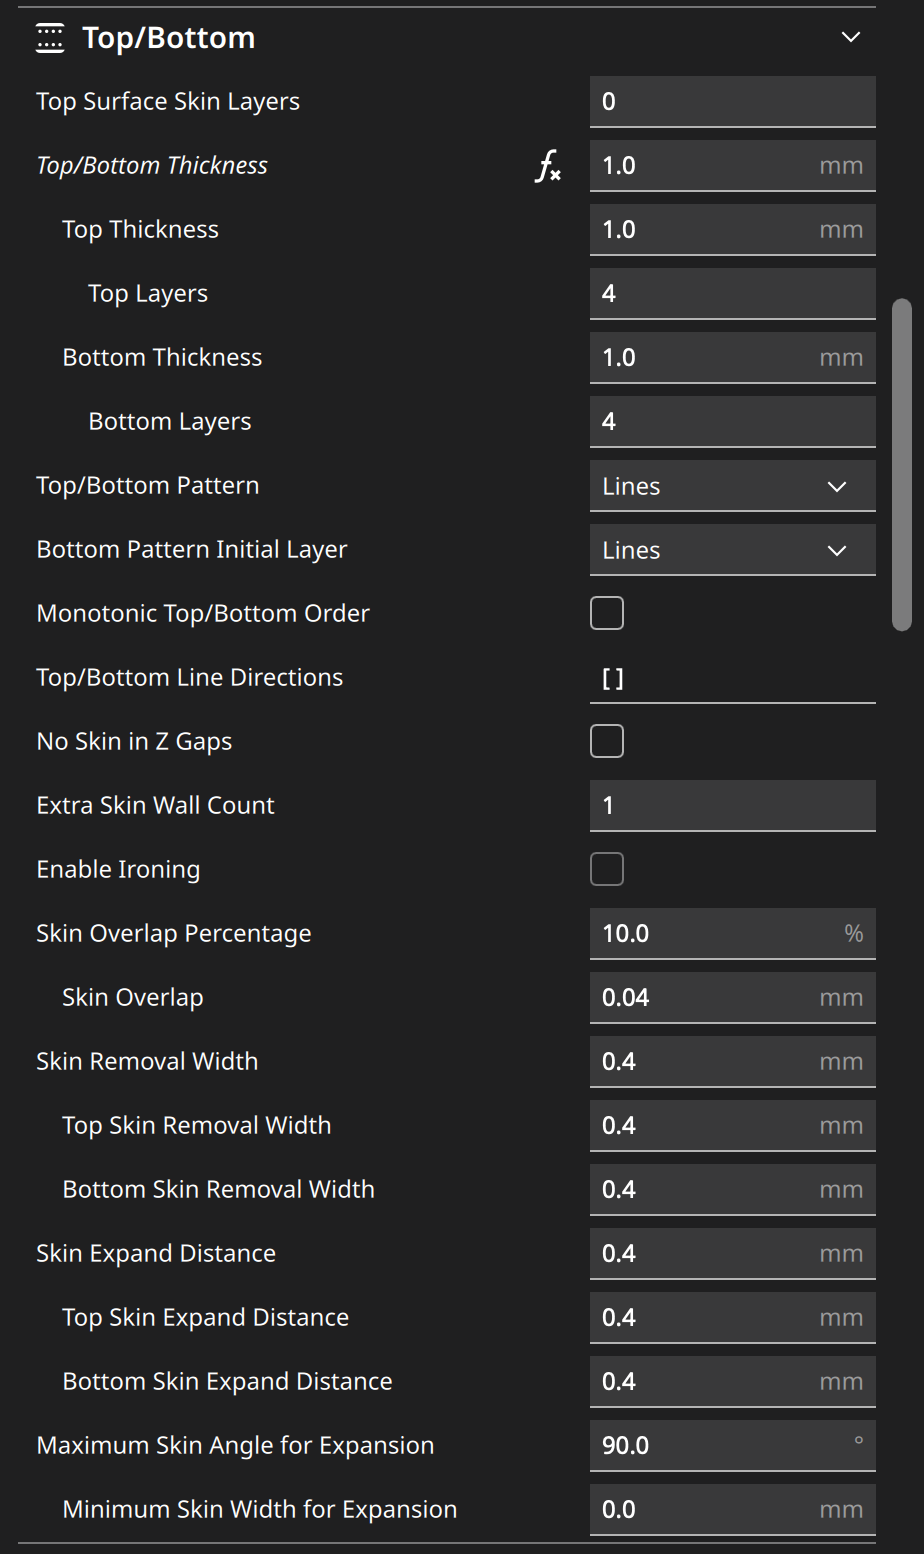
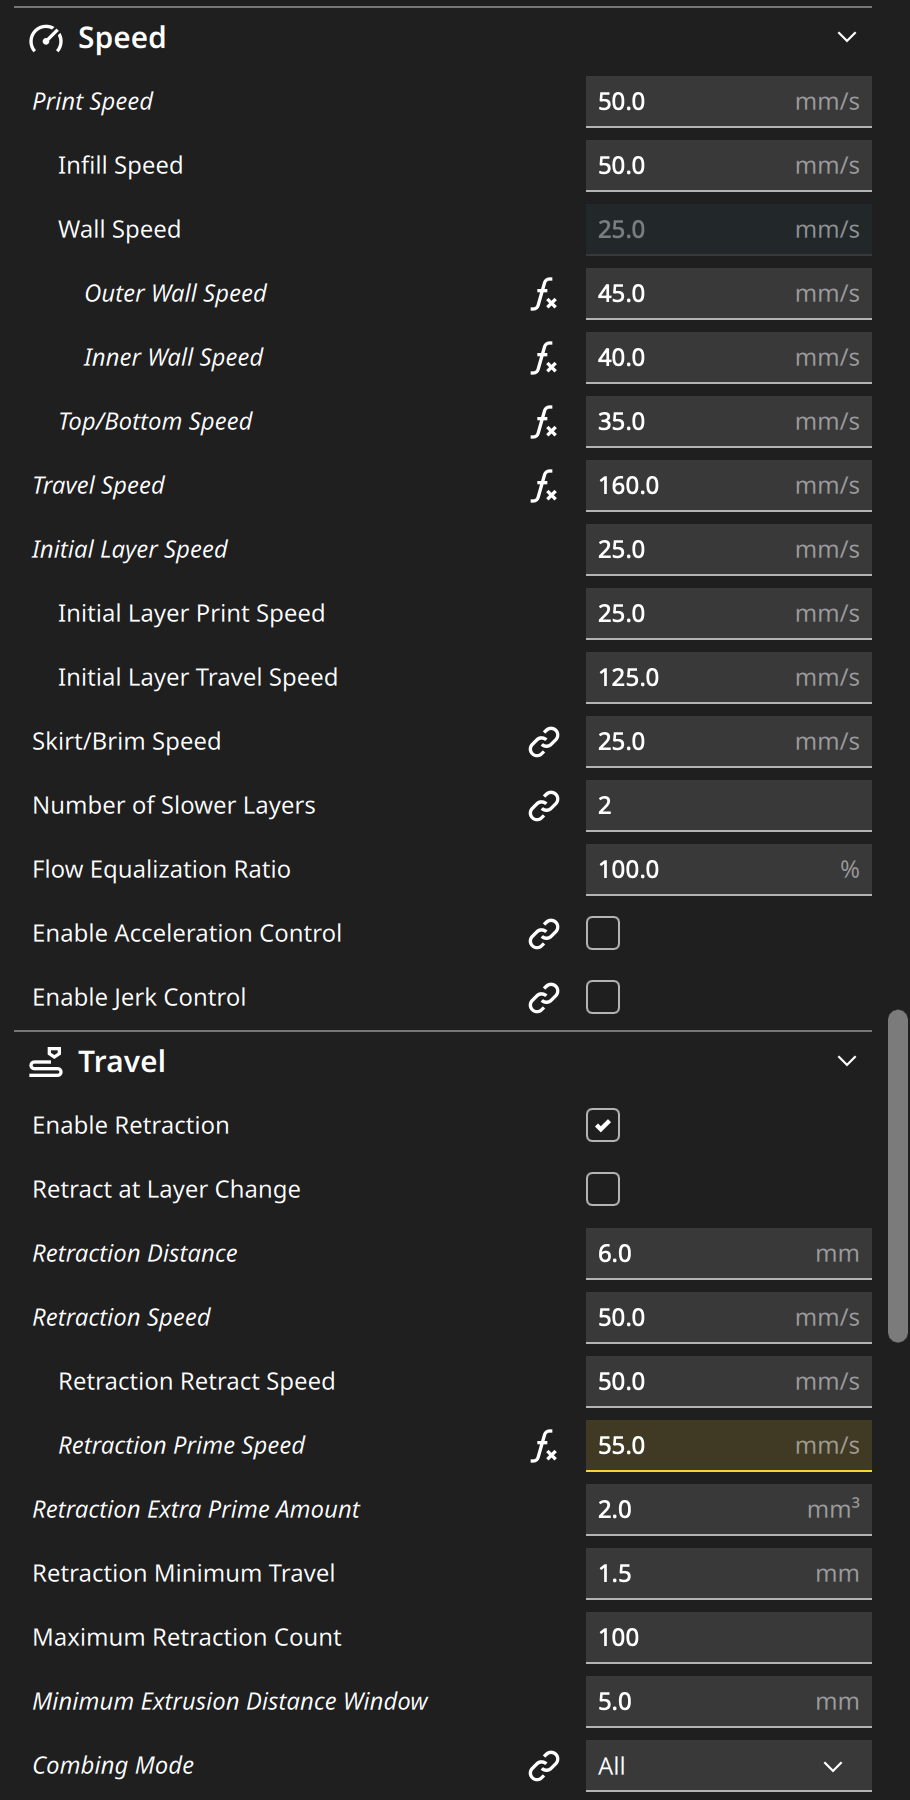
What settings should I use?
Please find below the Cura profile we commonly use for Neptunes and Enders. This is for the Polymaker prefoamed LWPLA. Foaming LWPLA is vastly different. Since profiles vary from printer to printer, your settings may differ. Hole horizontal expansion is probably the most important setting you’ll want to get right, as this determines how well the spars will fit during assembly. Retraction/travel settings are crucial as well for clean, gap-free single wall prints.
Also take a look at one of our planes’ manuals for more in-depth information.
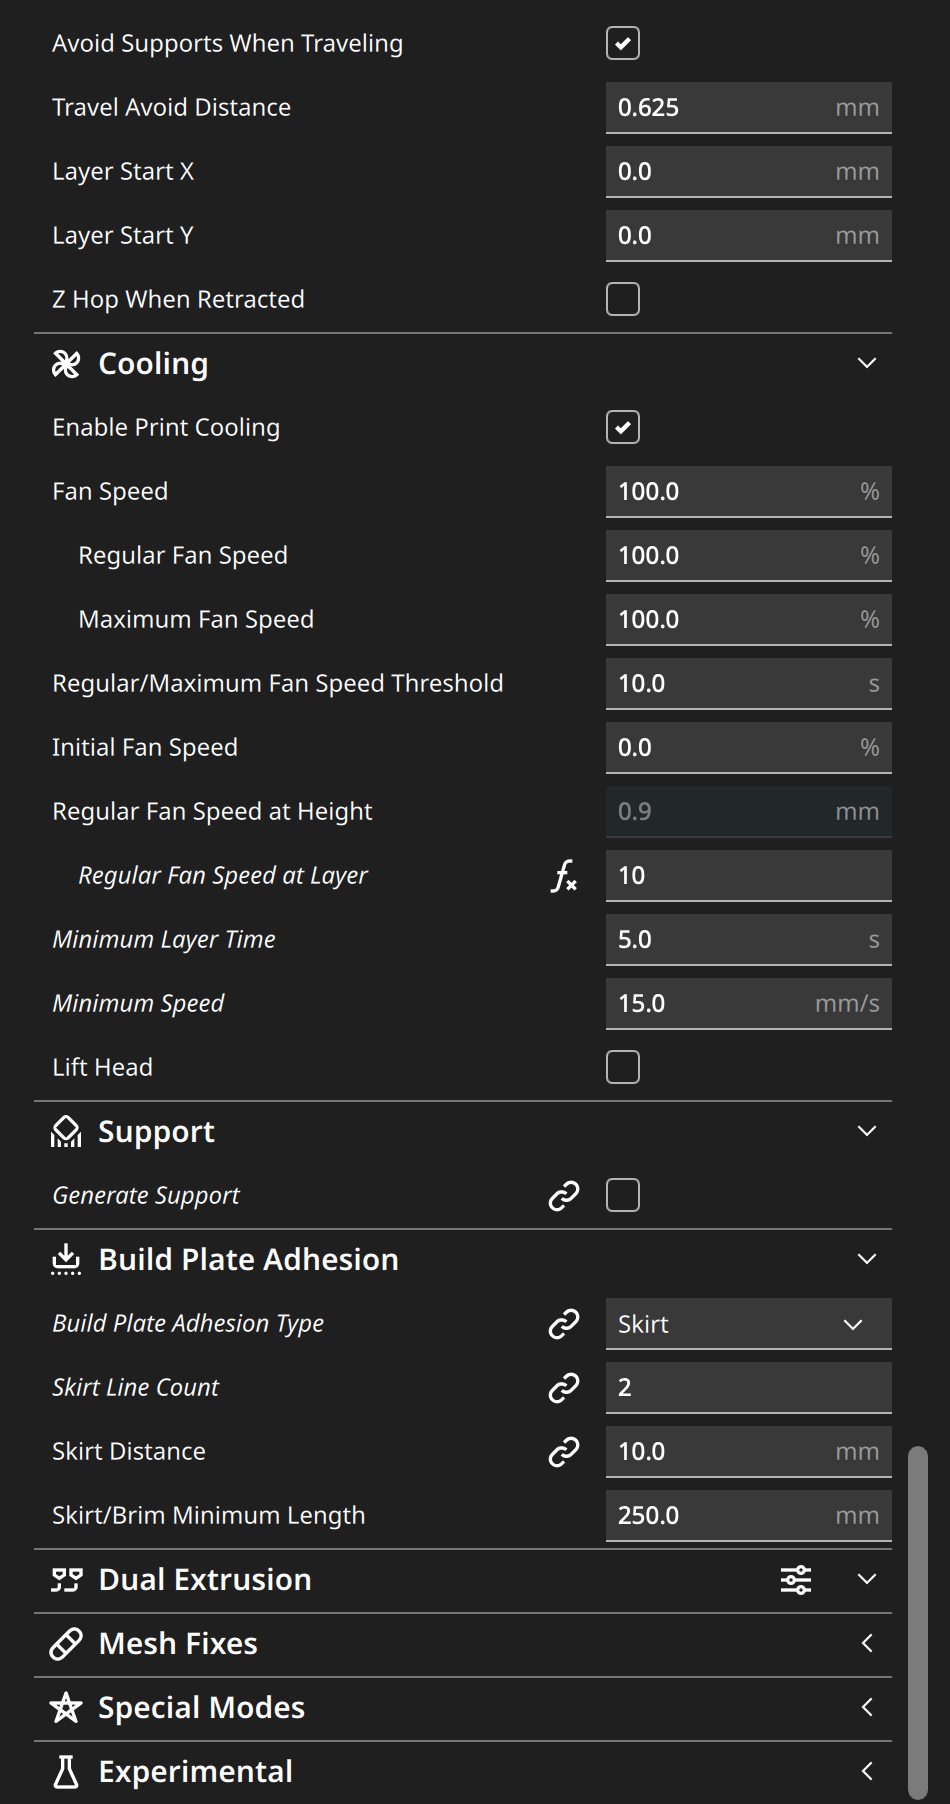
Why are there slits on the floor?

On most of our recent models, there are “slits” in the floor of the aircraft. These slits are 0.1mm wide and stop 0.4-0.8mm short of the top of the floor. They are there to trick your printer into printing a double-wall support in order to strengthen the floor and spread the load during landings. If this gap prints non-fused, please adjust your slicer settings.